お世話になっている作業用BGMサイト達
iOS端末情報リンクとメモ
wikipediaが充実しています。
端末の情報としてはほぼ十分では無いでしょうか。
iPhone - Wikipedia
早見表を作成されている方も。
風邪に関するメモ書き
ちょっと風邪ひいたので自分自身への注意も兼ねてメモ書きを残します。
風邪をひく場合
- 山登りなど体力を消耗しすぎた時
- 寝不足
- 栄養不足
風邪をひいた時の注意点
- 集中力が落ちる
- 注意力も落ちる
- 風邪に気づけない
- 風邪をひいた時のお前の判断は大体間違っている
定期的にやること
- 体温を毎日計測する
- 体を冷やさない
- 人混みではマスクを使用する
今回は山に登って体力消費したのに食べ過ぎで胃腸にも負担をかけたのが原因っぽいですね・・・
swift改行について
他の人が書いたソースコード読んで、ちょっと混乱したのでメモ
swiftは行終わりに ; を書かなくてもよい、であって書く事もできます。
なので
var strA:String = "strA"; var strB:String = "strB";
という形に一行で複数の変数宣言も可能です。
私はswiftでこの書き方はしませんが、良い使いかたもあるのかも知れませんね。
UIAlertControllerを使ってみる
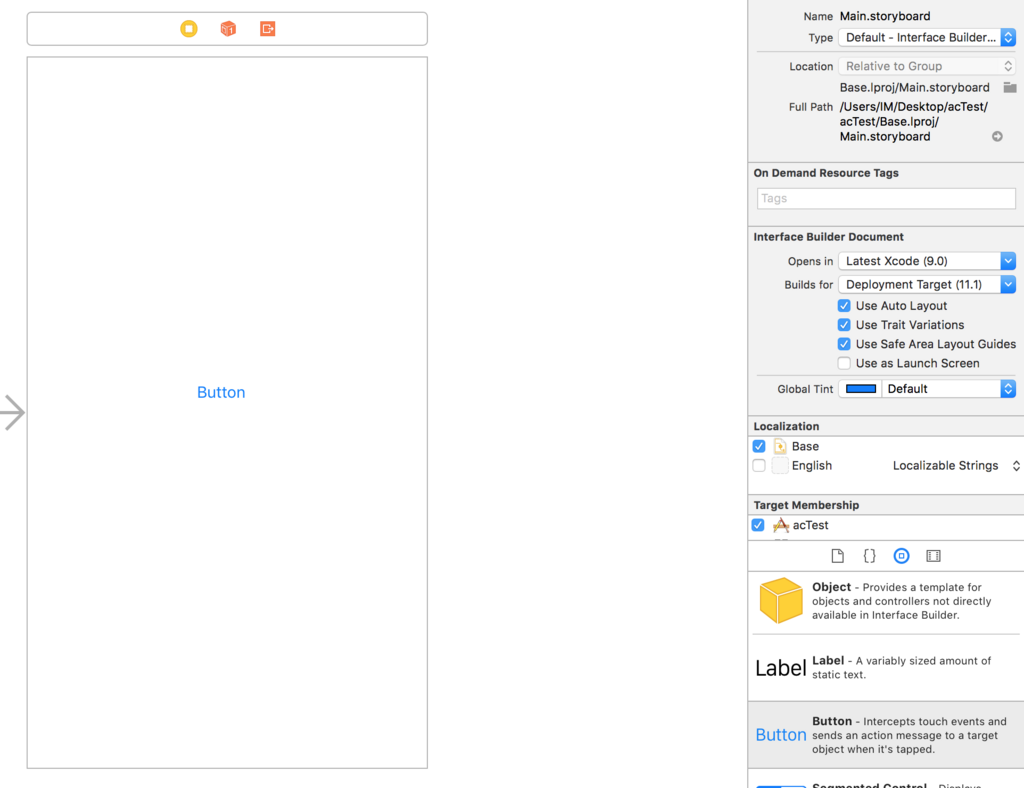
とりあえず画面にボタンを追加します

ボタン押下時にUIAlertControllerを表示するよう変更
    @IBAction func btnClick(_ sender: UIButton) {
        let ac = UIAlertController(title:"Title", message: "Message", preferredStyle: UIAlertControllerStyle.alert)

        let aDef = UIAlertAction(title: "default", style: UIAlertActionStyle.default, handler: {
            (action: UIAlertAction!) in
            print("Default!")
        })

        let aDes = UIAlertAction(title: "destructive", style: UIAlertActionStyle.destructive, handler: {
            (action: UIAlertAction!) in
            print("Default!")
        })

        let aCan = UIAlertAction(title: "cancel", style: UIAlertActionStyle.cancel, handler: {
            (action: UIAlertAction!) in
            print("Cancel!")
        })

        ac.addAction(aDef)
        ac.addAction(aDes)
        ac.addAction(aCan)

        self.present(ac, animated: true, completion:popoverPresentationController)
    }
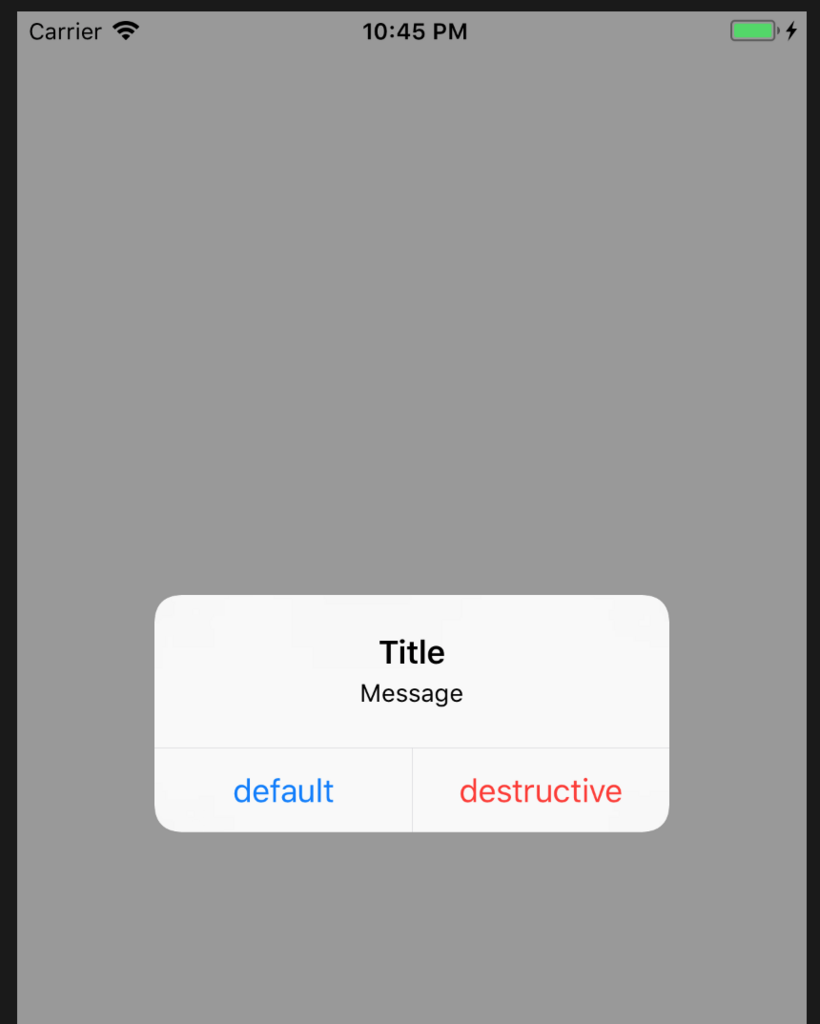
表示できました。
addActionを2つに減らすと表示されるボタンのスタイルが少し変わります。

できました。
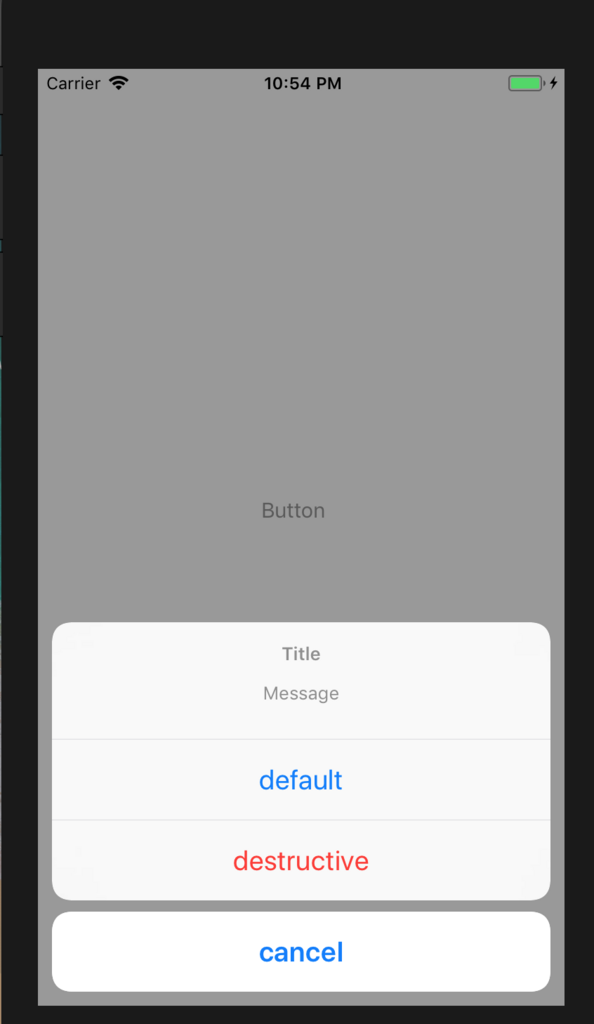
下からの表示に変更します。
UIAlertControllerStyle.alert を UIAlertControllerStyle.actionSheet に変更すれば下からの表示になります。
    @IBAction func btnClick(_ sender: UIButton) {
        let ac = UIAlertController(title:"Title", message: "Message", preferredStyle: UIAlertControllerStyle.actionSheet)

        let aDef = UIAlertAction(title: "default", style: UIAlertActionStyle.default, handler: {
            (action: UIAlertAction!) in
            print("Default!")
        })

        let aDes = UIAlertAction(title: "destructive", style: UIAlertActionStyle.destructive, handler: {
            (action: UIAlertAction!) in
            print("Default!")
        })

        let aCan = UIAlertAction(title: "cancel", style: UIAlertActionStyle.cancel, handler: {
            (action: UIAlertAction!) in
            print("Cancel!")
        })

        ac.addAction(aDef)
        ac.addAction(aDes)
        ac.addAction(aCan)

        self.present(ac, animated: true, completion:nil)
    }

できました。
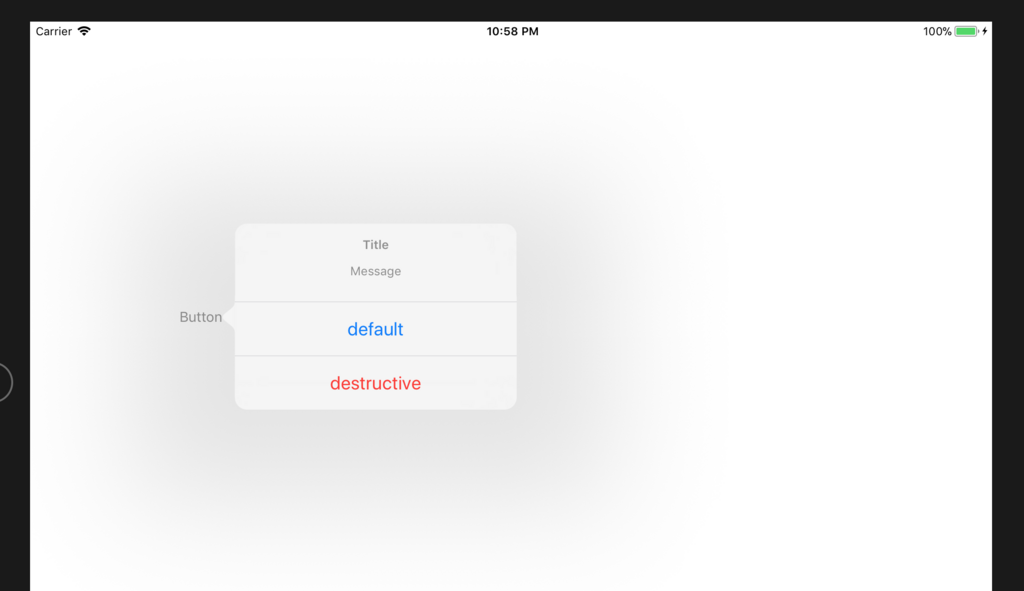
popoverで表示してみます。
UIAlertControllerStyle を actionSheet に変更すると popoverPresentationController の設定を使用できます。
iPhoneだと動作を確認できないので、iPadで実行します。
    @IBAction func btnClick(_ sender: UIButton) {
        let ac = UIAlertController(title:"Title", message: "Message", preferredStyle: UIAlertControllerStyle.actionSheet)

        let aDef = UIAlertAction(title: "default", style: UIAlertActionStyle.default, handler: {
            (action: UIAlertAction!) in
            print("Default!")
        })

        let aDes = UIAlertAction(title: "destructive", style: UIAlertActionStyle.destructive, handler: {
            (action: UIAlertAction!) in
            print("Default!")
        })

        let aCan = UIAlertAction(title: "cancel", style: UIAlertActionStyle.cancel, handler: {
            (action: UIAlertAction!) in
            print("Cancel!")
        })

        ac.addAction(aDef)
        ac.addAction(aDes)
        ac.addAction(aCan)

        ac.popoverPresentationController?.sourceView = self.view
        ac.popoverPresentationController?.sourceRect = btn.frame

        self.present(ac, animated: true, completion:nil)
    }

sourceRect に吹き出しを指したい位置を指定します。
インストーラーの少し修正を行った時のメモ
Xcodeでswiftを使って見ている所感など
現時点での分
- 作ったものを即動かせるので楽しいです
- Swiftはバージョンが変わるとかなり書き方が変わる印象が強いです
- 新しい書籍はObjective-cよりSwiftの方が多い気がします
- 多言語だと do - while 文が repeat - while と書くなど戸惑う事も多いかも知れません
swiftの学習に関して
AndroidStudioやEclipseでAndroid向け開発、もしくはVisualStudioでWindows向けの開発経験がある
- ドキュメントを読む(日本語ドキュメント - Apple Developer)
- 2017年末に発売される「詳解 Swift 第4版 荻原 剛志」を読んでみる(https://www.amazon.co.jp/%E8%A9%B3%E8%A7%A3-Swift-%E7%AC%AC4%E7%89%88-%E8%8D%BB%E5%8E%9F-%E5%89%9B%E5%BF%97/dp/4797395184)
スマホやタブレットなどの開発をしたことがないのであれば
- 「詳細! Swift 4 iPhoneアプリ開発 入門ノート」を読んでみる(https://www.amazon.co.jp/Swift-iPhone%E3%82%A2%E3%83%97%E3%83%AA%E9%96%8B%E7%99%BA-%E5%85%A5%E9%96%80%E3%83%8E%E3%83%BC%E3%83%88-Xcode-9%E5%AF%BE%E5%BF%9C/dp/4800711843)
- とりあえず Hello World! をシミュレータで動かしてみる(方法をネットで検索することも含めて練習だと思います)